Candle making has recently become a delightful trend that many people are craving. There’s something truly comforting about creating your own candles at home. Whether it’s the warm glow they provide, the delightful scents that fill the air, or the satisfaction of crafting something entirely your own, candle making is a rewarding hobby. I wanted to share this guide because I believe everyone should have the chance to enjoy this creative outlet.
If you’re someone who loves DIY projects or simply appreciates the beauty of handmade items, this post is for you. Whether you’re a beginner or have dabbled in candle making before, you’ll find something useful here. I’ve compiled step-by-step techniques that are straightforward and easy to follow, ensuring that you can create perfect candles every time. From selecting the right materials to troubleshooting common issues, you’ll gain insights that will help you light up your space with your unique creations.
By the end of this guide, you’ll be equipped with the knowledge to make beautiful candles that not only look great but fill your home with wonderful aromas. You’ll discover tips for gathering supplies, choosing the right wax, and even personalizing your candles with colors and scents. So, grab your supplies and let’s dive into the world of candle making together!
Key Takeaways
– Gather Your Supplies: Start with essential materials like wax, wicks, and fragrance oils to set the foundation for your candle making.
– Choose the Right Wax: Understand different types of waxes and their melting points, so you can select the one that best suits your desired candle style.
– Wick Selection: Learn how to pick the right wick size for your candle type, ensuring an even burn and maximum scent throw.
– Scenting Your Candles: Explore essential oil blends that enhance the fragrance of your candles, allowing you to create the perfect ambiance.
– Personalizing Your Candles: Discover creative ways to decorate your candles, making them not just functional, but also beautiful additions to your home decor.
1. Gather Your Supplies: The Basics You Need

Ready to start your candle-making adventure? Gathering the right supplies is the first step toward creating beautiful candles. You’ll need essential items like wax, wicks, and containers. Choose from options like paraffin, soy, or beeswax to suit your style. Each type offers different melting points and scent retention capabilities, making your candles unique.
Ensure you pick wicks that fit your containers well, available in materials such as cotton or wood. Personalize your candles with fragrance oils and color dyes for that extra touch. Don’t forget to have a double boiler for melting wax and a thermometer to keep track of temperatures.
Tip: Setting up a dedicated candle-making area can help you stay organized and focused. Use a measuring cup for precise wax and oil ratios, and wear protective gear like gloves and aprons to keep things tidy.
Here’s what you need to get started:
– Wax: choose from paraffin, soy, or beeswax
– Wicks: cotton or wood
– Scent oils: your favorite fragrances
– Color dyes: optional for personalization
– Double boiler: for melting wax
– Thermometer: to monitor temperatures
– Containers: jars, molds, or tins
Follow these steps to begin your candle-making journey:
1. Measure your wax based on container size.
2. Melt the wax in a double boiler, stirring occasionally.
3. Secure the wick to the container’s bottom.
4. Add scent oils at the right temperature.
5. Pour melted wax into containers and insert the wick.
6. Let candles cool completely.
7. Trim the wick to about 1/4 inch once set.
2. Choose the Right Wax: A Melting Point Guide

Selecting the right wax is key to crafting candles that burn beautifully. Each wax type brings its own benefits. For instance, soy wax is favored for a clean burn and excellent scent retention, while beeswax offers natural aromas and purifying qualities. Paraffin wax, on the other hand, is budget-friendly and comes in various melting points.
Understanding these melting points helps you choose the best wax for your project. Soy wax melts at around 120-180°F, whereas paraffin typically melts between 130-160°F. This knowledge is vital for managing the pouring temperature, especially when adding fragrance and color.
Tip: Try experimenting with different wax types to discover unique textures and finishes for your candles. Blending waxes can enhance the characteristics of each type for optimal results.
Here’s what to consider when selecting wax:
– Soy wax: clean burning and holds scent well
– Beeswax: natural scent with air-purifying properties
– Paraffin wax: cost-effective with various melting points
To choose your wax:
1. Research melting points for potential wax types.
2. Define your goals: clean burn, scent throw, or budget.
3. Test small samples of different waxes before buying in bulk.
4. Document your results to refine your candle-making process.
3. Wick Selection: Finding Your Perfect Match

Selecting the right wick is critical for optimal candle performance. The wick influences burn quality, scent throw, and overall effectiveness. Options include cotton, wood, and bamboo wicks, each offering distinct experiences. Cotton wicks are standard for most candles, while wooden wicks add a delightful crackling sound that enhances the ambiance.
Wick size is also essential! A wick that’s too small can lead to poor burning, while a wick that’s too large may cause excess soot. It’s crucial to match the wick size with your container’s diameter and wax type. Testing various sizes and materials is vital for perfecting your candles.
Tip: Use wick stickers to keep your wicks securely in place during pouring. Always trim your wicks to the proper length before lighting for a cleaner burn and less soot.
Here’s what to gather for wick selection:
– Cotton wicks: general-purpose use
– Wooden wicks: for a unique crackling sound
– Wick stickers: for secure placement
Steps to find your perfect wick:
1. Measure the container diameter and type of wax.
2. Refer to a sizing chart for guidance.
3. Affix the wick to the container’s base using a sticker.
4. Conduct a test burn to evaluate performance.
5. Adjust wick size based on test results for future candles.
Related Articles
- 🕯️ The Flame and the Signature: Candle Logo Design That Glows Like a Canyon Campfire

- ✨ Sky Within: False Ceiling Living Room Designs That Sculpt Light & Elevate Everyday

- ☁️ Sleeping Beneath the Sky: Cloud Ceiling Dreams That Float Like Summer Cumulus
- 🕯️ Candle Design: Sculptural Wax & Flickering Atmosphere
- 🪵 Plywood Ceiling: Warmth, Texture & Modern Rustic Appeal

- 🕯️ Classic Ceiling Design: Ornate Details & Timeless Overhead Elegance
4. Scenting Your Candles: Essential Oil Blends

Adding scent is what elevates a candle from ordinary to extraordinary. Essential oils not only provide fragrance but also offer therapeutic benefits. When blending scents, aim for a harmonious balance that pleases the senses without being overpowering. Popular combinations like lavender and vanilla promote relaxation, while citrus blends invigorate your space.
When incorporating scents, timing is everything. Adding fragrance oils at the right temperature ensures the best scent throw. Typically, mixing in oils around 185°F helps achieve a strong aroma without losing the fragrance during the pouring process.
Tip: Conduct small tests to discover which scent ratios you enjoy most. Keep track of your blends to recreate your favorites in the future.
Here’s what you’ll need for scenting:
– Essential oils: lavender, vanilla, lemon, orange, etc.
– Carrier oil: if needed for blending
Steps to scent your candles:
1. Choose your essential oils and decide on a blend ratio.
2. Melt the wax to the right temperature for mixing.
3. Stir in the essential oils thoroughly.
4. Pour the scented wax into prepared containers.
5. Allow to cure for a few days to enhance scent throw.
5. Adding Color: Dyes and Pigments

Color enhances the visual appeal of your candles, transforming them into eye-catching pieces. Candle dyes are available in various formats, such as liquid, powdered, and dye blocks, each with unique effects. Liquid dyes create vibrant colors, while powdered dyes yield softer, translucent finishes.
Always test a small amount of dye in melted wax before committing. Keep in mind that colors may shift slightly as they cool and harden. Mixing different colors can yield stunning shades, so don’t hesitate to experiment with your creations!
Tip: Wear gloves when handling dyes to prevent staining your skin or surfaces.
Ingredients for adding color:
– Candle dyes: liquid, powdered, or dye blocks
Steps for adding color:
1. Choose your dye type based on desired effects.
2. Measure a small sample of wax for testing.
3. Mix the dye into melted wax and stir well.
4. Adjust dye amounts until you reach your desired shade.
5. Pour the colored wax into containers when ready.
📹 Related Video: How to Color Soy Candles Using Candle Dye – 3 Ways to DIY Candle Dye
6. Pouring Techniques: Tips for a Smooth Finish

Pouring your wax correctly is essential for a professional-looking finish. A slow, steady pour prevents air bubbles and ensures even distribution. Depending on your container type, you may need to adjust your technique; pouring at a lower temperature can reduce cracking as your candle cools.
Always save a bit of wax in the pot to fill any sinkholes that form as the candle cools and settles. This technique guarantees a smooth top that looks polished and clean.
Tip: Use a thermometer to check your wax’s pouring temperature. Pouring at an angle can help minimize splashes and guide the wax into intricate molds.
Essentials for pouring:
– Melted wax: at optimal pouring temperature
– Containers or molds: ready to fill
Steps for pouring:
1. Prepare containers with secured wicks.
2. Monitor the melted wax temperature.
3. Pour slowly, starting in the center and moving outward.
4. Fill just below the rim to allow for expansion.
5. Top off with reserved wax if necessary after setting.
Latest Articles
- 🕯️ The Flame and the Signature: Candle Logo Design That Glows Like a Canyon Campfire
- ✨ Sky Within: False Ceiling Living Room Designs That Sculpt Light & Elevate Everyday
- ☁️ Sleeping Beneath the Sky: Cloud Ceiling Dreams That Float Like Summer Cumulus
- 🕯️ Candle Design: Sculptural Wax & Flickering Atmosphere
- 🪵 Plywood Ceiling: Warmth, Texture & Modern Rustic Appeal
- 🕯️ Classic Ceiling Design: Ornate Details & Timeless Overhead Elegance
7. Curing Your Candles: The Waiting Game

After pouring, the key ingredient is patience! Curing allows your candles to harden properly, enhancing scent throw and burn quality. Ideally, let your candles cure for at least 24 to 48 hours before lighting. This resting period helps the wax and fragrance bond effectively.
Avoid moving or disturbing your candles during this time, as it can mar their surface. Curing not only boosts the burn quality but also maximizes scent strength when lit.
Tip: If you’re in a humid area, place your candles in a cool, dry spot to speed up the hardening process and avoid condensation issues.
What you need for curing:
– Poured candles: ready for setting
Steps to cure your candles:
1. Let your poured candles set undisturbed for 24-48 hours.
2. Keep them in a cool, dry area, away from sunlight.
3. Check for imperfections and fix them with extra wax if needed.
4. Once cured, trim the wick before lighting.
8. Troubleshooting Common Issues

Every candle maker encounters challenges, but knowing how to troubleshoot can enhance your craft. Common issues include uneven burning, soot around the wick, or fading scents. If your candles burn unevenly, it may be due to incompatible wick size with the wax and container. A small wick can cause tunneling, while a large one may produce soot.
For weak scent throw, ensure you’re adding oils at the correct temperature and in sufficient amounts. Trimming the wick to the right length before lighting can also help reduce soot.
Tip: Keep a journal for each candle, noting any problems and solutions to learn and improve for future projects.
Common tools for troubleshooting:
– Airtight container: for storing wax
Steps to troubleshoot:
1. Identify the issues with your candles: burning problems, scent throw, etc.
2. Adjust wax or wick choices for future pours.
3. Test temperature variations for pouring wax or adding scent.
4. Keep detailed notes on your findings for reference.
9. Personalizing Your Candles: Creative Decor Ideas

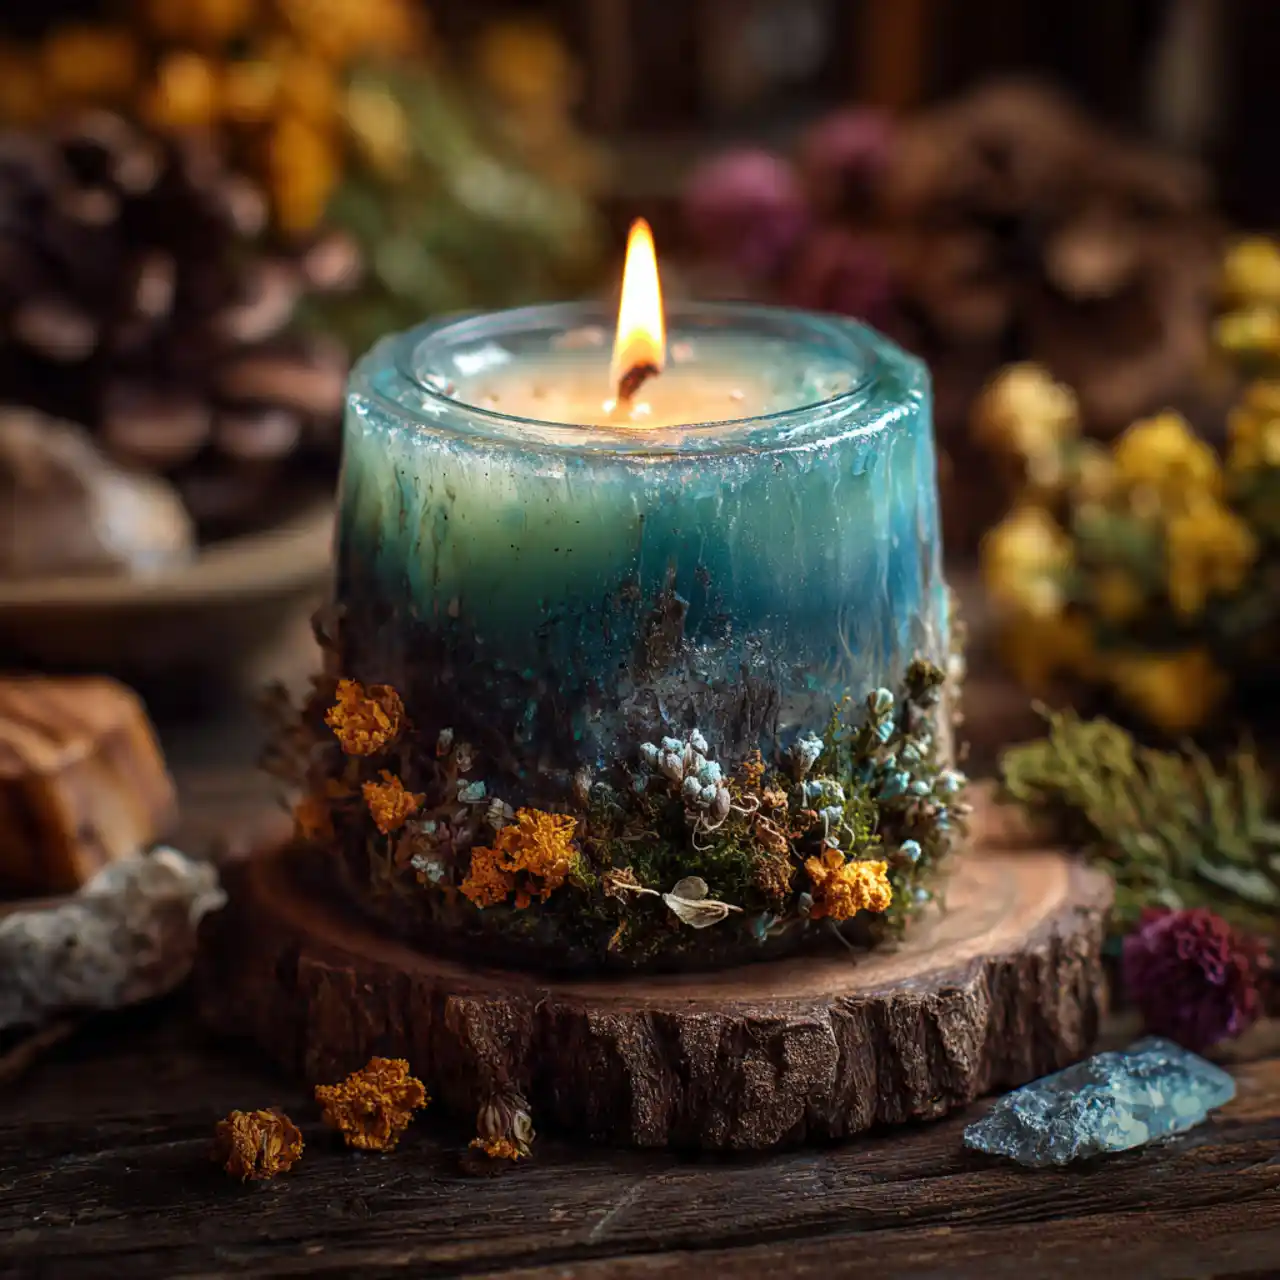
Candles can be more than just functional; they can be stunning pieces of art! Personalizing your candles adds a unique touch, making them perfect gifts or decorative items for your home. Consider decorating the outsides with twine, dried flowers, or even painting the containers for a creative flair.
If you’re feeling adventurous, try embedding crystals or decorative elements within the candles for striking visual effects. Seasonal themes, like autumn scents paired with fall decorations, can make your candles even more special.
Tip: Ensure any decorations you use are heat-resistant to avoid fire hazards when the candle is lit.
Items for personalizing candles:
– Twine, dried flowers, or decorative items: for exterior decoration
– Heat-resistant crystals or charms: for embedding
– Paint or markers: for container designs
Steps for personalizing your candles:
1. Once your candles are set, consider how to personalize them.
2. Attach decorations to the container with glue or twine.
3. If embedding items, place them before the wax solidifies.
4. Allow any added decor to cure along with the candle.
How To Choose The Right Wax for Candle Making
When it comes to candle making, selecting the right wax is crucial. The type of wax you choose affects everything from the scent throw to the burn time. Here are some key factors to consider when picking the ideal wax for your candles:
1. Wax Type
Candles can be made from various types of wax, including paraffin, soy, beeswax, and palm. Paraffin is economical and widely available, making it popular for beginners. Soy wax is renewable and burns cleanly, while beeswax offers a natural, sweet aroma. Palm wax provides a unique texture and is also eco-friendly. Choose based on your values and the desired characteristics of your candle.
2. Melting Point
Different waxes have different melting points, which can affect how you work with them. For example, paraffin typically melts around 130-140°F (54-60°C), while soy wax melts at about 120-180°F (49-82°C) depending on the blend. Knowing the melting point helps you control the pouring process and prevent overheating, ensuring a smooth finish.
3. Scent Throw
The wax you choose impacts how well your candle holds and releases fragrance. Soy wax has a great scent throw, making it ideal for scented candles. Paraffin can also hold scents well but may sometimes release them differently. If you want maximum aroma, test how each type holds essential oils before committing to a large batch.
4. Burn Time
The longevity of your candle is determined by the type of wax. Soy wax burns slower than paraffin, giving you a longer-lasting candle. Beeswax is the longest-burning option, making it perfect for those wanting a candle that lasts. Evaluate how long you want your candle to last and choose your wax accordingly.
5. Environmental Impact
Consider the ecological footprint of the wax you select. Soy wax is renewable and biodegradable, making it a popular choice for eco-conscious makers. Beeswax is a natural byproduct of beekeeping. If sustainability matters to you, opt for waxes that are certified organic or sourced from sustainable practices.
6. Cost
Prices vary widely among different wax types. Paraffin is generally the most affordable, while natural options like beeswax can be more expensive. If you’re just starting, you might want to experiment with lower-cost waxes before investing in pricier materials. Keep your budget in mind as you explore your options.
Pro Tip: Always perform a small test batch with your chosen wax before committing to a large production. This allows you to check for any issues with melting, scent throw, and overall performance. It’s a great way to fine-tune your technique and ensure you’re happy with the results!
10. Enjoying Your Creations: The Perfect Light

Now it’s time to savor the fruits of your labor! Light your candles after they’ve cured properly and enjoy the ambiance they create. Whether you’re relaxing, celebrating, or simply filling your space with delightful scents, your handmade candles are ready to shine.
Consider hosting a small gathering or pampering yourself to showcase your creations. Sharing your candles with friends and family is a wonderful way to spread warmth and joy. Plus, there’s nothing like the satisfaction of using something crafted with your own hands.
Tip: Reflect on what you’ve learned during the candle-making process and think about trying new scents and techniques in future batches.
What you need for enjoying your candles:
– Your fully cured candles: ready to light
Steps to enjoy your creations:
1. Trim the wick to 1/4 inch before lighting.
2. Place the candle in a safe, non-flammable holder.
3. Light it and appreciate the warmth and fragrance.
4. Share your creations with friends or use them for special occasions.
💡
Key Takeaways
Essential tips from this article
🛠️
BEGINNER
Gather Essential Supplies
Collect all necessary materials like wax, wicks, and molds before starting for a smooth candle-making process.
🔥
ESSENTIAL
Select the Right Wax
Choose a wax type based on its melting point to ensure optimal results for your candle’s burn time and fragrance.
🕯️
PRO TIP
Perfect Wick Match
Select a wick that matches your candle’s size and wax type to achieve an even burn and prevent tunneling.
🌼
ADVANCED
Blend Scents Wisely
Experiment with essential oil blends to create unique fragrances that enhance the ambiance of your candles.
🎨
QUICK WIN
Add Color Creatively
Use dyes and pigments to customize your candles’ appearance, making them visually appealing and personal.
⏳
WARNING
Cure for Best Results
Allow candles to cure properly before use to enhance scent throw and improve burn quality.
Conclusion: Your Candle Making Journey Awaits
There you have it! With these step-by-step techniques, you can now embark on your own candle-making adventure. Remember, every candle is a unique creation, and with a little practice, you’ll hone your skills and develop your personal style. Enjoy the process, experiment with new ideas, and let your creativity shine!
Don’t forget to share your lovely creations with friends and on social media; the world deserves to see your bright light!
Frequently Asked Questions
What are the essential tools and supplies I need for candle making to get perfect results every time?
To start candle making, gather these essentials: a reliable wax, the correct wicks for your container, fragrance oil, and color, a thermometer, a double boiler or melting pot, a heat-safe pitcher, a scale, molds or jars, stirring sticks, and protective gear.
Choose a wax type (soy, paraffin, beeswax) that suits your project and pair it with a wick sized for your container.
Prepare a clean, steady workspace and a spill-proof surface.
Keep a simple log to record melt temperature, fragrance load, and pour temperature as you follow a step-by-step process.
With careful attention to these basics, you’ll be ready to apply techniques for smooth pours and strong scent throw.
How should I choose the right wax, wick, and fragrance to achieve consistent, high-quality candles?
Choosing the right candle making components starts with compatibility. Start with a wax you trust (soy for clean burns, paraffin for strong scent, beeswax for natural options) and pair it with a wick sized for your container. For fragrance, use the manufacturer’s recommended load by weight (commonly around 6–10% for many soy blends) and perform small tests to confirm scent throw. Always test with your specific container and room temperature to avoid weak or uneven burn. Keep a log of wax type, wick size, fragrance load, and pour temperature for a reliable step-by-step process that yields repeatable results. By following these methods, you’ll master essential techniques for consistent candles every time.
What temperatures and timing should I follow during the candle making process to ensure good results?
During candle making there are a few key temperatures and timing steps to follow for consistent results. Melt your wax to about 170–180°F and keep it there for a brief stir, then add fragrance at about 170°F and mix well.
Let the scented wax cool to around 130–140°F before pouring into containers to reduce shrinkage and frosting.
After pouring, let the candles cure in a draft-free area: soy blends typically benefit from 1–2 weeks of cure before burn tests, while beeswax or paraffin may be ready sooner. Record temperatures, pour times, and cure durations so you can repeat your best results on the next batch.
How can I troubleshoot common candle problems like tunneling, frosting, or poor scent throw?
Here’s a practical step-by-step troubleshooting guide you can use anytime:
• Tunneling — switch to a wick with a larger diameter or change wick type; ensure the wick is centered; re-pour after trimming the top layer.
• Frosting — maintain pour and cure temperatures in the recommended range and avoid over-mixing fragrance; try a different wax blend if persistent.
• Poor scent throw — verify fragrance load matches your wax, ensure proper cure time, and test in a similar room; adjust fragrance load or curing time as needed.
• Uneven burn or soot — check wick height and trim to about 1/8 inch before lighting and ensure the initial burn reaches the edges.
Document your batch to refine the steps. These techniques help you fix issues without starting from scratch.
How long should I cure my candles and how can I test burn quality and scent throw before using or selling?
After pouring, give your candles a proper cure: soy blends typically benefit from 1–2 weeks of cure, while beeswax or paraffin may be ready in 3–7 days. Then do a burn test: trim the wick to about 1/8 inch, light and let it burn for 1–2 hours to ensure a full melt pool reaches the edges. If tunneling occurs, adjust the wick size and re-test after curing. Assess scent throw by burning in a typical room and noting how strong the aroma is after a few hours; compare to your target. Keep a batch log of cure times, burn results, and scent strength to ensure repeatable results in your step-by-step candle making process.